
September 2019

Our new Outdoor Clay Oven
An outdoor oven is one of the projects that has been on our bucket list for several years. Being off grid, we don’t have an electric stove and our only oven is in the wood cookstove, a Kitchen Queen 480. During the summer months, the stove is seldom lit, and we do the majority of our cooking using small electric appliance (electric skillet, induction hot plate, rice cooker, slow cooker) running on solar power. We have a homemade solar oven that works great to heat foods up, but not to actually bake in. This year we finally tackled this project and the outdoor oven is now in service.
We spent last winter researching different methods of building the oven. The information can be overwhelming and many times we threw up our hands and said “Lets just buy one.” But finally we took the advise of SimpleNick.com – “Just Do It.”
Our oven is a hybrid of several different methods. A good part is based on Simple Nick’s method, part on the traditional operational clay oven, or pietz, we have in our hometown, and part on our own intuition.

Ovens of Clay Booklet by Stella Kowalchuk
The clay oven in town was built about 25 years ago and is still in operation. Every August, the museum committee fires it up and bakes 140 loaves of bread, which we serve with homemade borsch (Ukrainian beet soup) and homemade jam. The process they used to make the oven was documented in a booklet written by Stella Kowalchuk, “Ovens of Clay”. (The booklet is for sale at the Ukrainian Cultural Heritage Museum in Sandy Lake, Manitoba)
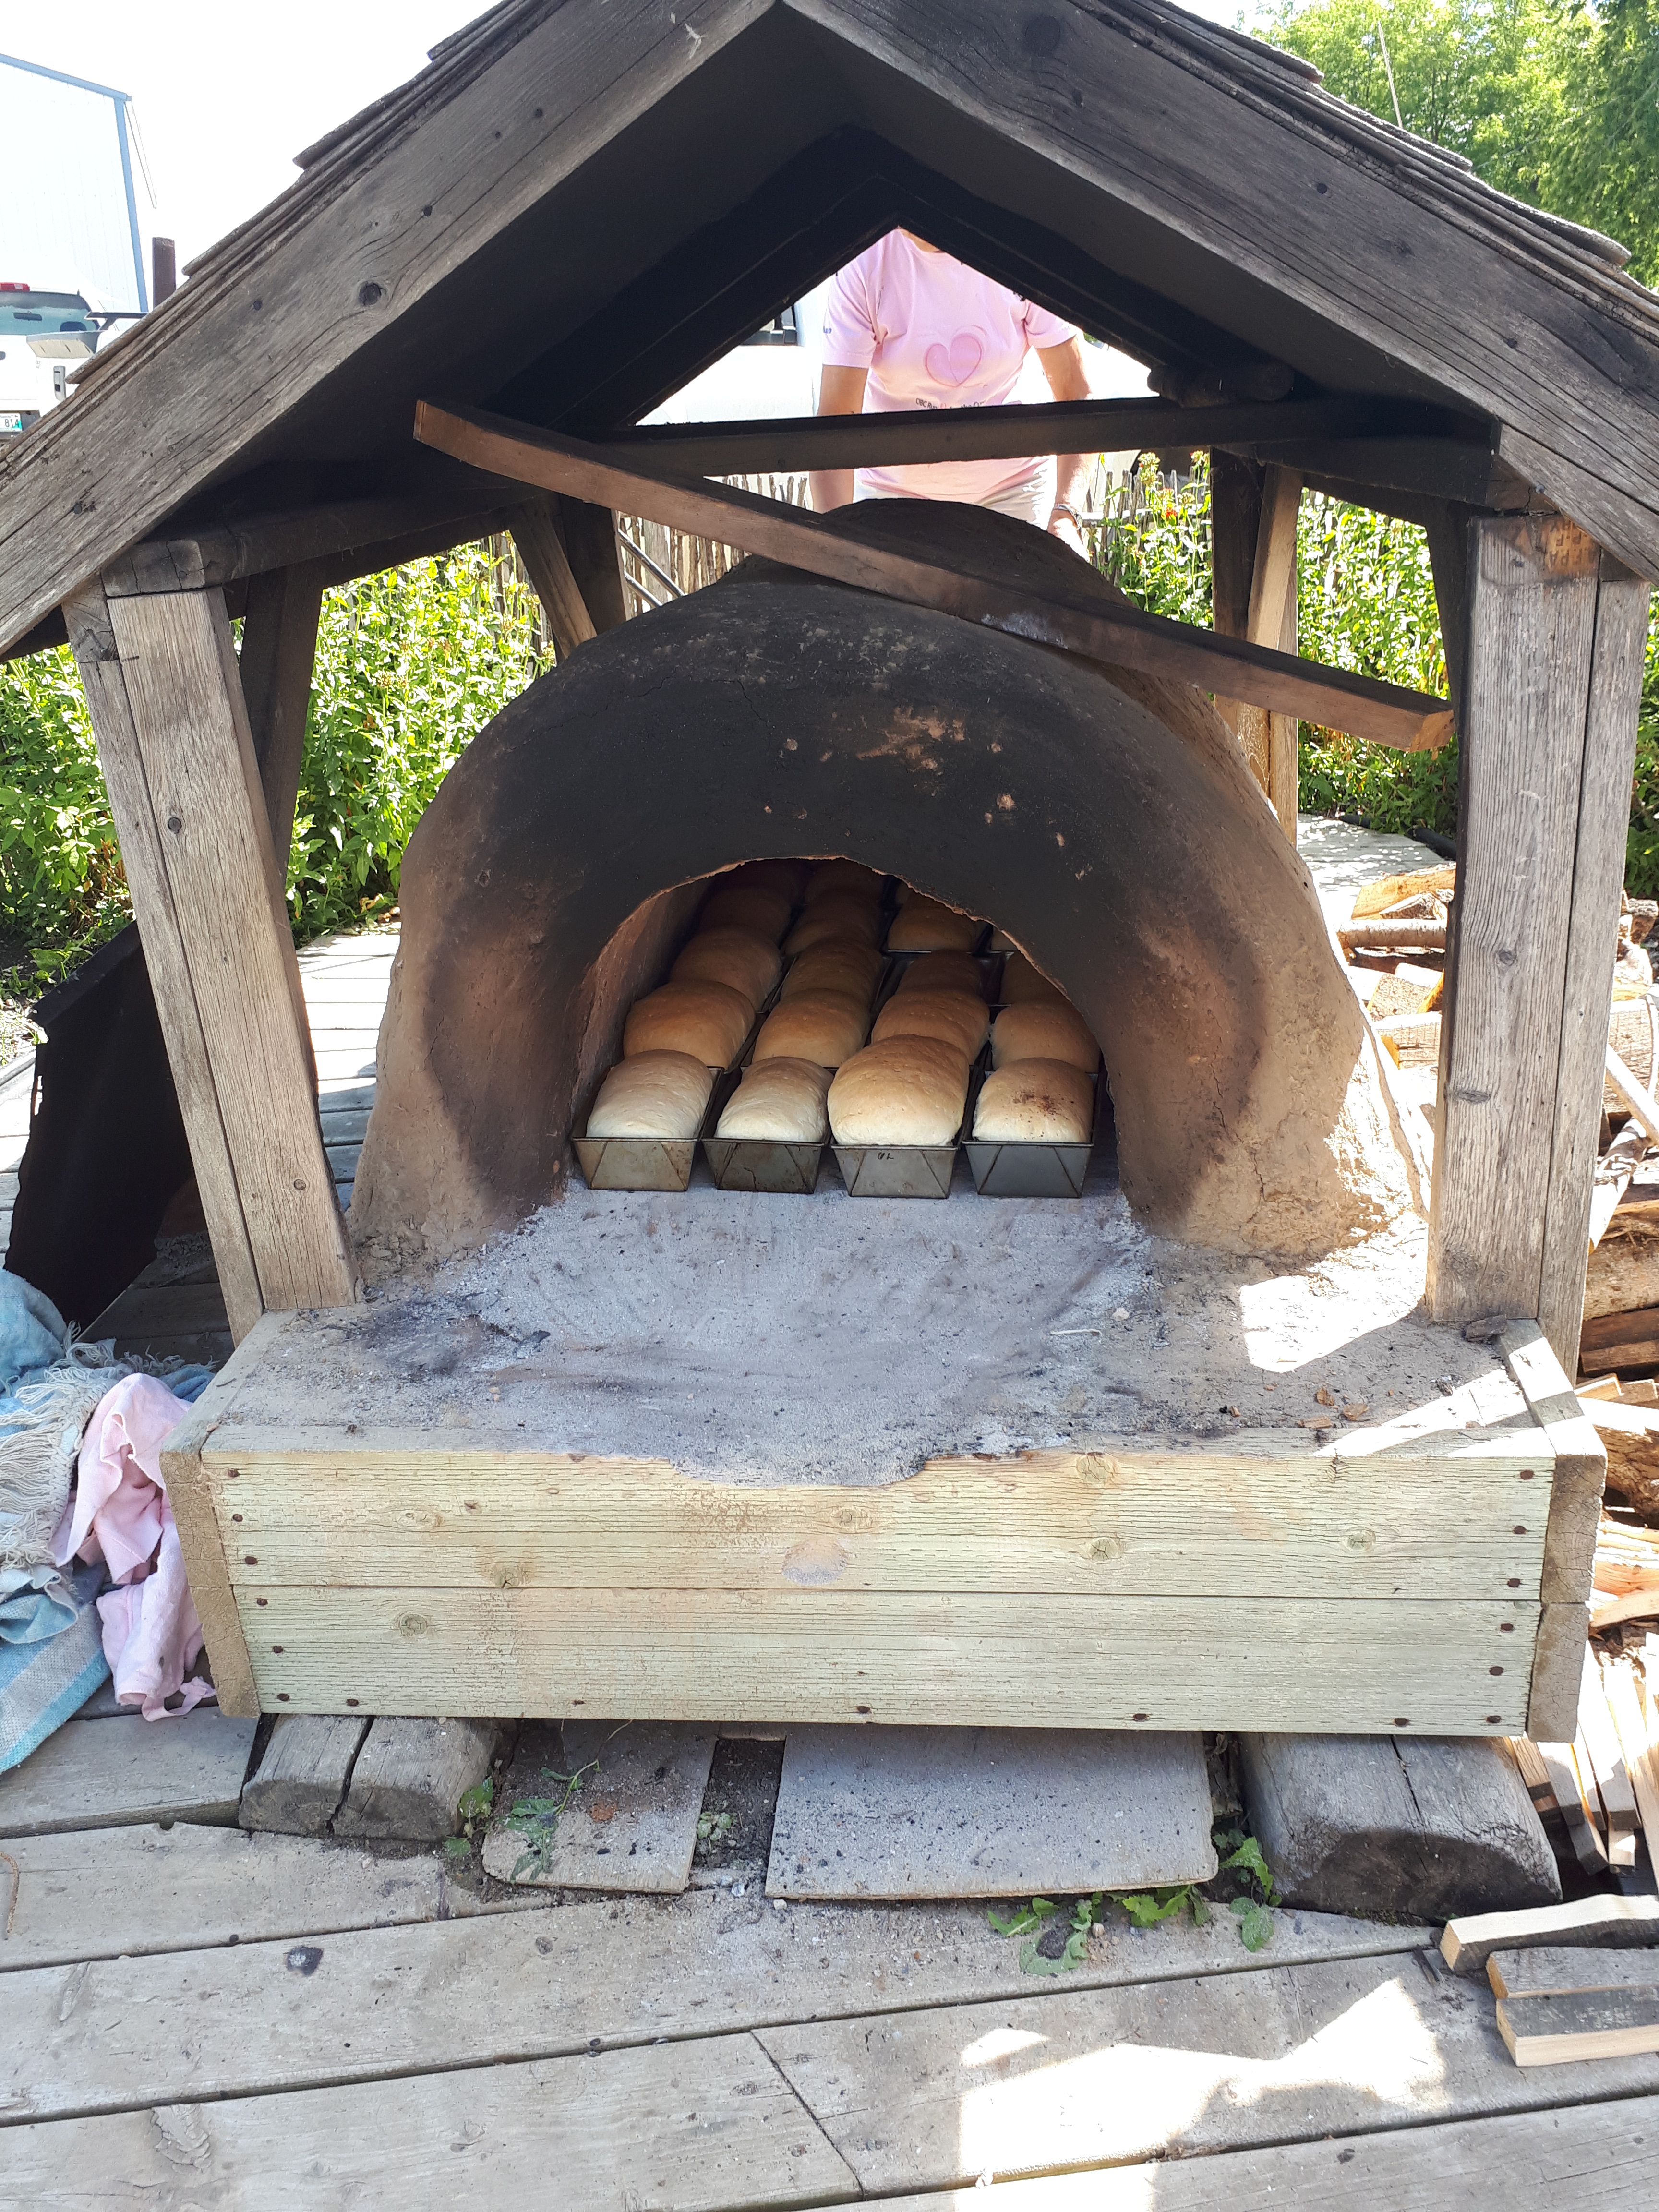
Baking bread in traditional clay oven – pietz – in Sandy Lake
The oven in town can hold up to 20 loaves of bread and I love helping at the annual bread making. The experience baking in the clay oven also provided me with some ideas about what I wanted in my oven. Firstly, I didn’t need it big enough to bake 20 loaves, second, I wanted it higher off the ground, and third I wanted a more robust exterior to protect it from the elements.
Simple Nick has great step by step instructions on how to build a clay oven. For compete instructions, visit his site.

Purifying clay
CLAY We were fortunate to find a great deposit of clay on the property. The clay was pretty nice, but for good measure we processed the clay to remove organic matter and small rocks. To process – Simply mix the clay with water to form a thin mixture. Strain through a screen to get the clay water. Let sit for a day or two until the water and clay layers separate. Pour off the water and let the clay sit and dry out until the desired consistency is achieved. Too dry, no problem. Just add water and let set a couple hours and it will re-hydrate. In hindsight, it probably was not necessary to process the clay, but it wasn’t much extra work and quite a lot of fun to play in the mud. The finished processed clay would make an excellent pottery clay for fun projects with the grandchildren.
DESIGN We settled on a dome design, based on Simple Nick’s method. The interior of the oven would be about 28 inches in diameter with a 3 inch wall of clay and sand, topped by a 3 inch wall of clay and straw for insulation and finally a layer of concrete and rocks to form a weather protection on the outside. The final size being about 48 inches wide and 60 inches long, to accommodate a front tunnel entrance to the dome oven.
SITE We chose to build the oven off the outdoor kitchen, overlooking the lake. Its far enough from the house not to be a fire hazard, and close enough to the kitchen to be handy. Ken shored up the ground and built a shale base.

Build a strong solid base
BASE The clay oven in town is about 1 foot off the ground, meaning you need to kneel to get the bread into and out of the oven. My first request was that the oven be counter top height. And I wanted a space under the oven for wood storage. So the first step of building our oven was to build the base or plinth.
We built a 3 sided plinth out of concrete blocks. The front is open for wood storage. Concrete was poured into some of the block holes to make it solid. I love the way Ken used a few rocks at the front instead of half blocks.
On the concrete blocks he then made a solid platform of 2×6’s, topped by 2×4’s going the opposite way, and screwed into the 2×6’s. And on top of the wood base, is a sheet of concrete board (aka Hardy Board).

Oven floor – 8 inches of clay, rock and firebricks
OVEN FLOOR We chose to make the oven floor based on the outdoor oven in town, sort of. The oven has a clay floor with rocks in the clay to hold the heat from the oven. We added a topping of firebricks along with the clay and rocks. (In hindsight I don’t think the firebricks were necessary. The oven floor is about 8 inches thick, so little worry about heat transfer to the wood below.)
We then cemented in large rocks around the perimeter to outline the outside of the oven, and put in 2 concrete blocks at the front to serve as the floor to the oven entrance tunnel. We poured concrete in the holes of the concrete blocks. This gave us a wall around the outside and we could fill the inside with clay. First we put in a layer of plain clay. Then we added a layer of rocks (to hold the heat from the oven) and topped that will a layer of clay and then firebricks.

Build a sandcastle that will become the inside of the oven.
CORE OVEN We used wet sand to shape the inside of the oven. We had some doubts on whether this would work or not, but it worked unbelievably well.
In hindsight, we should have built the sandcastle a bit higher. the proportions looked good when we were building it, but when it comes to making a fire, there is not a lot of room to work in. However, the smaller size does make it easy to heat up.

Proper brick consistency
Once you have your big sand castle that will become the inside of your oven, you mix clay (we used our processed clay for this part) and sand together then formed it into bricks that we layered around the sand castle. This wall is about 3 inches thick. Lessons learned – our clay/sand mixture was a bit too wet and kept sliding down the dome. Make sure your clay is not too wet and you can make a nice solid brick, like the one pictured on the right. As a result of the clay sliding down, our dome became a bit bell shaped. To compensate, once it dried, we added another layer of clay/sand on the top.

Cut the entrance hole and scoop out the sand
We let the sand/clay mixture dry for about 24 hours then cut out the front entrance and scooped out the sand. We then let the dome dry a bit longer and even built a small drying fire in it.

Build entrance tunnel
ENTRANCE AND CHIMNEY To make the front entrance, we scrounged around the local garbage disposal site for usable material. We found old bricks and a piece from a concrete fire pit that we thought would work well. Using a cardboard template, Ken built a wooden form for the entrance then used the bricks and mortar to build an arched entrance. The piece of curved concrete for a fire pit worked perfectly to form the curved top of the dome.

Connect dome to front entrance and install chimney
Once that was done, he used the same wooden form (with an added piece of old arborite to form a smooth surface for the arch) to install the chimney by moving the form further into the dome so it was in the space between the dome and the arched entrance.
Our chimney is a piece of 3 inch tail pipe we got from a neighbor. He attached some clamps to it help it stand on the arch form and to help the clay adhere to the pipe to keep it in place.He then packed clay/sand mixture around the chimney and between the dome and entrance. After this dried he removed the form (saved it to use as a template to build the door.)

Mixture of clay and straw
INSULATION LAYER The next layer on the dome was a mixture of clay and straw to provide insulation for the oven. We didn’t bother using purified clay for this step as we were mixing straw into it anyway. Just mix it all up and layer it on about 4 inches thick.
Let dry and your base oven is ready to use.

Let the oven dry out
We made a few small fires in the oven to dry it out completely. Unable to wait any longer, we fired up the oven with a roaring fire and made our first pizza.

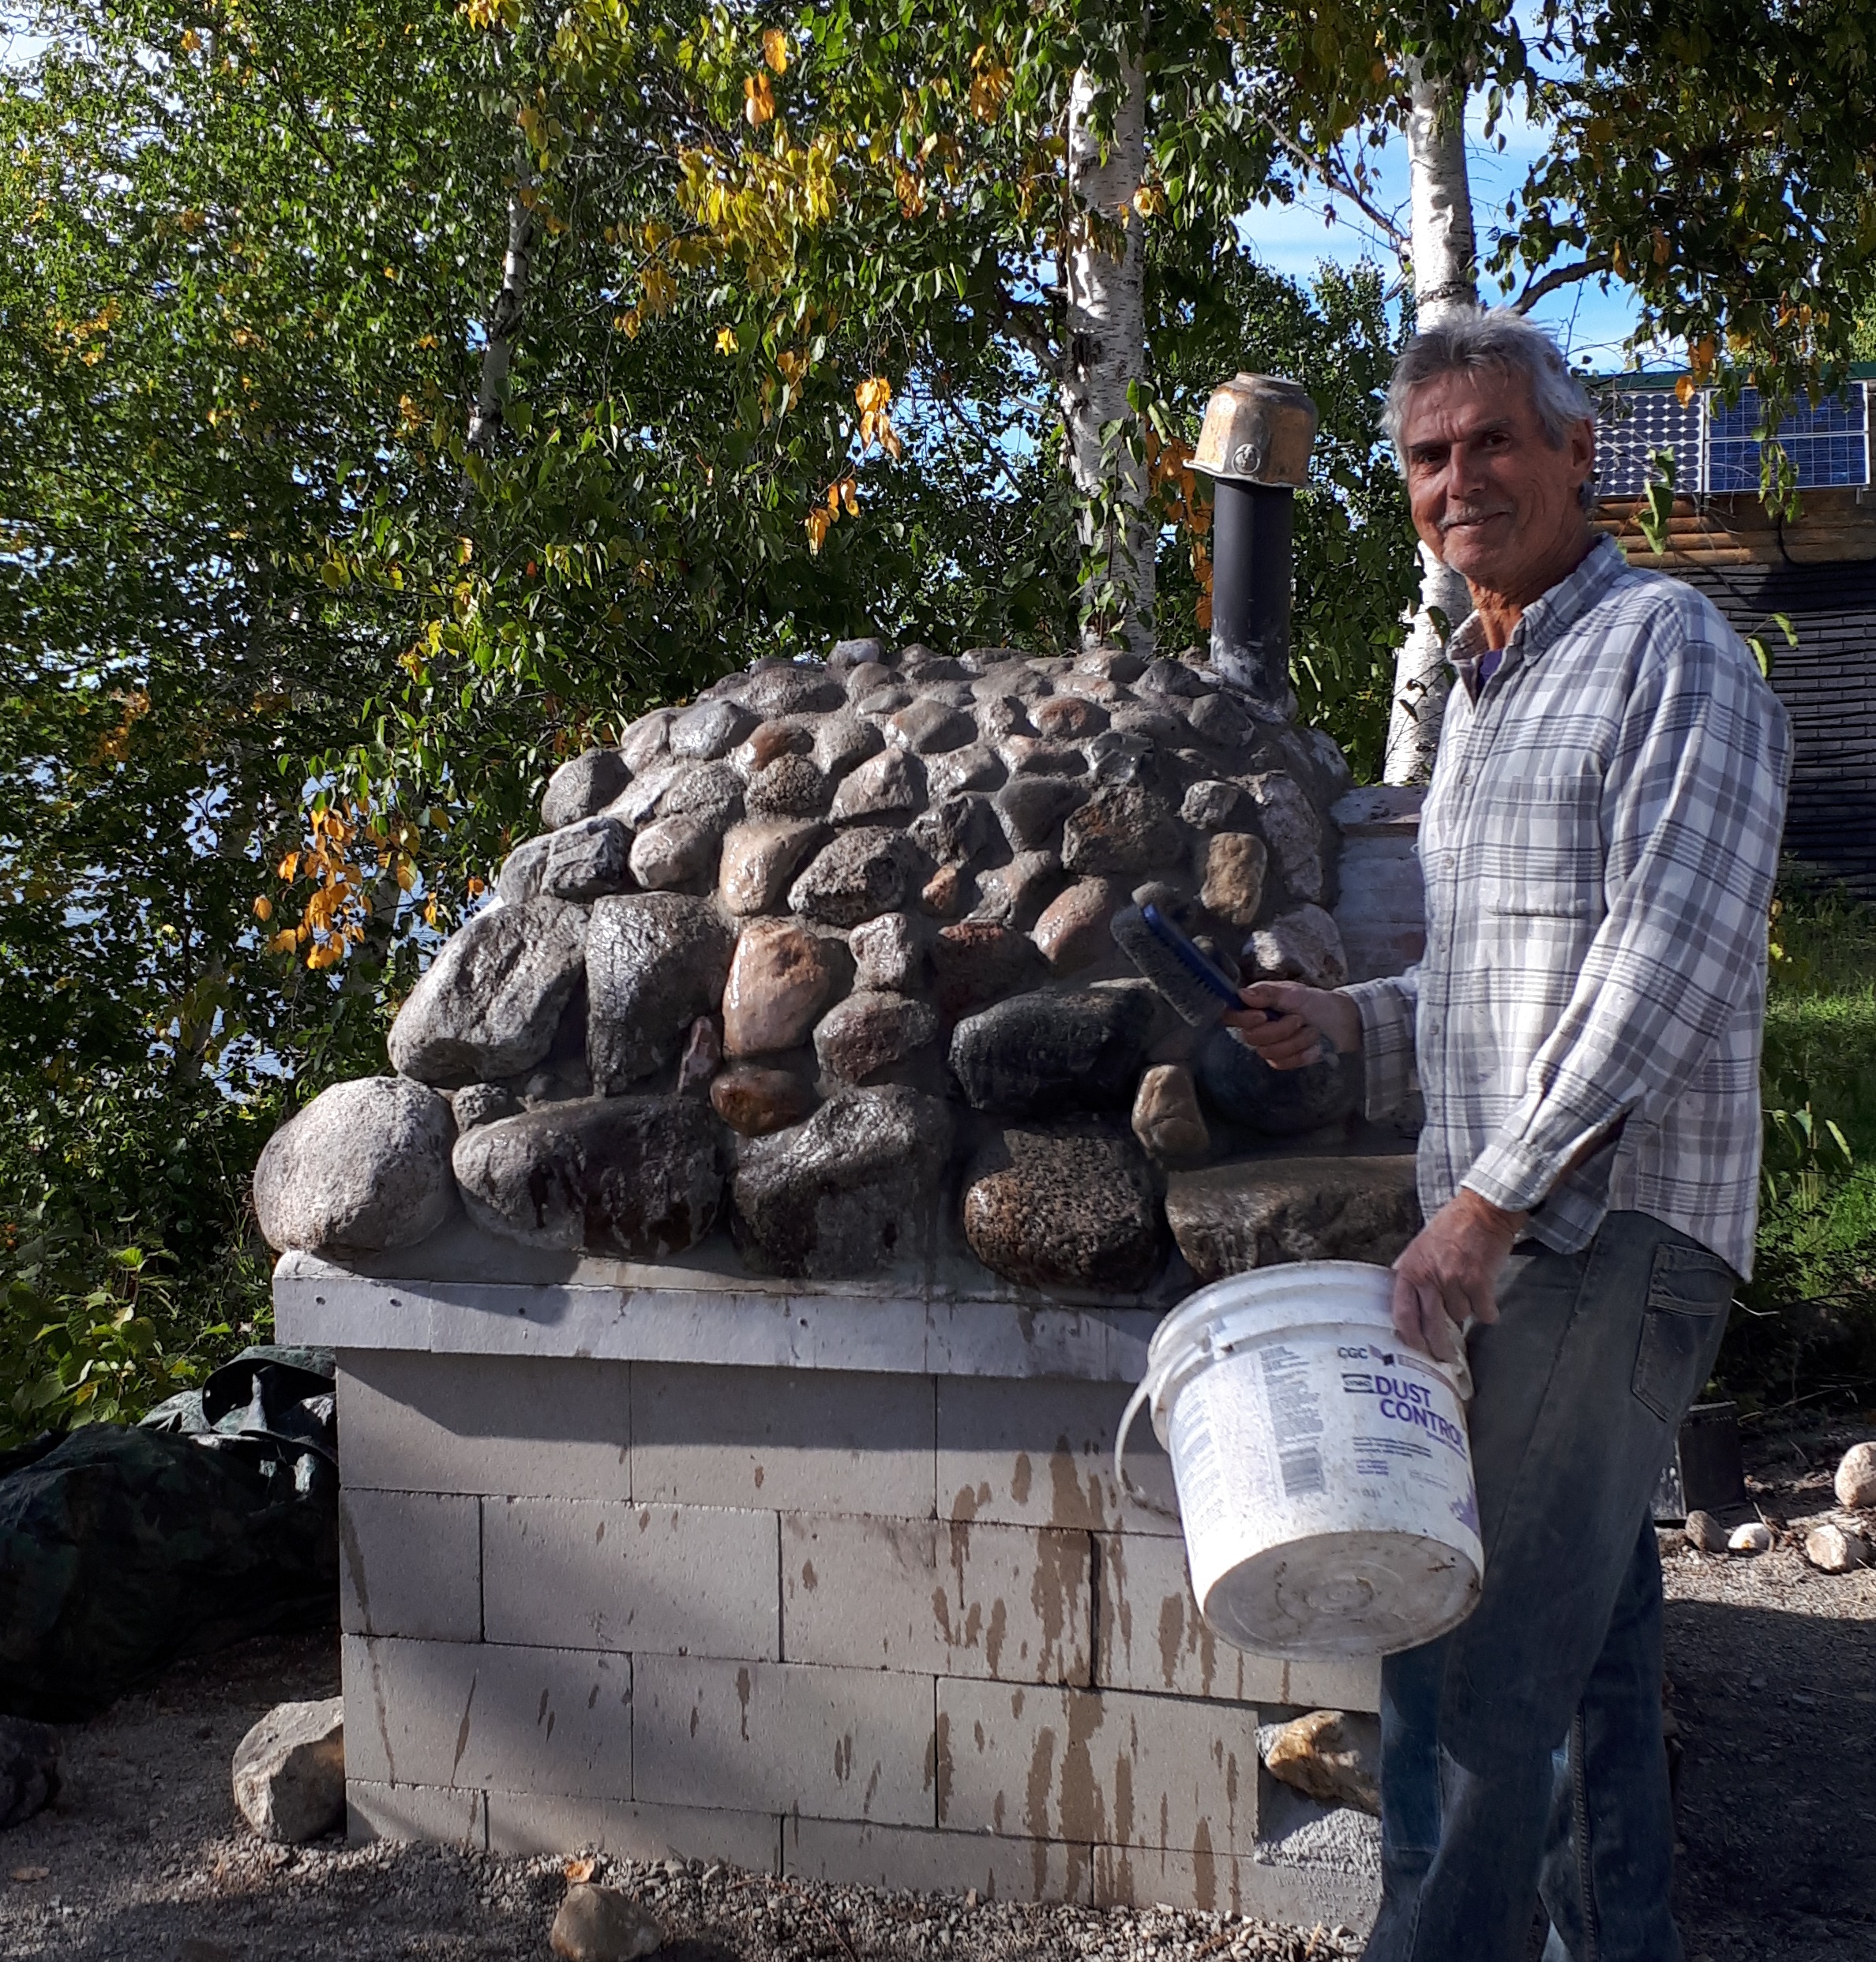
Add protective layer of rock and mortar
PROTECTION LAYER As a clay oven will readily absorb water from rain, you need to protect it from the elements or it will rapidly fall apart. We chose to cover our oven with field stone and mortar. We used fairly large rocks around the bottom (the weight supported by the plinth) but smaller ones on the top (so the dome would not collapse). Take care to cover the whole area with mortar and try not to have any dips, valleys or cracks that water can accumulate in. To be on the safe side, we will tarp our oven when its going to rain and for the winter. (we use a small brass pot to seal off the chimney when the oven is not in use. )
 DOOR The final step was to build a good door for the oven. We used two pieces of 2×6 lumber for the outside and a piece of aluminum (scrounged from the farm) for the inside. Sandwiched between the two sides is a piece of asbestos rope, leftover from a chimney install, leaving an air gap between the two sides. The rope also makes for a nice tight seal when the door is in place. To provide airflow to the fire when the door is closed, I asked for a hole in the door that could be plugged. Ken installed a metal drain pipe instead. It actually works quite well and it can be plugged when you want to seal off the oven.


 OPERATION To use the oven you simply build a small fire inside. It doesn’t take much wood to get the oven hot. For pizza, you need a pretty hot oven (500F to 600F), so you need to keep the fire going for a couple hours. Then push the coals to the back or side of the oven, slip in the pizza stone, close up the oven and let it sit to get the stone hot. Then place your pizza on the hot pizza stone and it will cook up in 5-10 minutes, depending on the temperature of the oven.
 For bread, the oven needs to be around 350F. Get the oven nice and hot (fire for an hour or two) then push the coals to the back of the oven and let the oven cool to between 350F and 400F. Once it reaches that temperature, put the bread in and close up the oven tight. I put a cap on the chimney (an old brass pot) to prevent heat loss. Don’t peek for at least 30 minutes. It should take about 45 minutes to 1 hour to bake.
 We have used the oven several times now and it works wonderfully. We have made pizzas, buns, bread and even cooked casseroles in it. Now that fall is here, we don’t have much use for the outdoor oven, but it will be great to have it for next summer.

We would sure like a copy of how to make the oven. My husband is Ukrainian and I’m low German. We would just make it and have it on my hushband’s land that he was born on.